"Who doesn't like beer?" said somebody or other on a TV
programme (actually The Mentalist) that I watched last night. Good
question! In reality, I suppose quite a lot of people don't like
beer, and some are even fundamentally opposed to the very idea of
it, but that's not the point. Thousands of years after the secret
of beer making was discovered and man turned from hunter gatherer
into farmer, just so that a sustainable supply of beer could be
produced, people across the world are still drinking the stuff.
For the person in question on the TV show, it took the offer of
one bottle of beer from Patrick Jane to buy his secrets. But look
here, you're getting mine for nothing. I already have plenty beer
of my own!
There are loads of guides to making beer on the internet including
videos, all slightly different. There is no single right way, most
will make good beer and in fact if you get the basics right, it is
hard not to make good beer. Here is my way...
Beer, the making of, part 1:
Recipe - although not essential, it helps to have an idea in your
mind before you start. There are various programs which you can
use to help design your beer; I like Beer Engine because it's free
and does all I need. Using this, I conjured up the following
recipe for a tasty dark beer. It is code-named Barrel Scraper
because the recipe originally came about when using up various
left over grains and hops. It has mutated with virtually every
incarnation. Here is the latest:
| Fermentable |
Colour |
lb: oz |
Grams |
Ratio |
| Pale Malt |
5 EBC |
6 lbs. 9.8 oz |
3000 grams |
69.8% |
| Chicken food, mixed grain |
0 EBC |
2 lbs. 3.3 oz |
1000 grams |
23.3% |
| Chocolate Malt |
1050 EBC |
0 lbs. 3.5 oz |
100 grams |
2.3% |
| Crystal Malt |
130 EBC |
0 lbs. 3.5 oz |
100 grams |
2.3% |
| Roasted Barley |
1350 EBC |
0 lbs. 3.5 oz |
100 grams |
2.3% |
| Hop Variety |
Type |
Alpha |
Time |
lb: oz |
grams |
Ratio |
| Target |
Whole |
12.5 % |
90 mins |
0 lbs. 0.9 oz |
25 grams |
62.5% |
| Challenger |
Whole |
7.6 % |
15 mins |
0 lbs. 0.5 oz |
15 grams |
37.5% |
| Final Volume: |
23 |
Litres |
| Original Gravity: |
1.038 |
|
| Final Gravity: |
1.010 |
|
| Alcohol Content: |
3.7% |
ABV |
| Total Liquor: |
32.6 |
Litres |
| Mash Liquor: |
12.9 |
Litres |
| Mash Efficiency: |
70 |
% |
| Bitterness: |
43.6019742022358 |
EBU |
| Colour: |
82 |
EBC |
To anyone versed in these things, the above should need little
explanation, apart from the ingredient "Chicken food, mixed
grain". This is because I'm using a big bag of mixed grains
(probably mostly barley and oats, some whole grains, some cracked
and some milled) that were given to me by a neighbour who works at
a mill, to feed to the chickens. This replaces flaked barley in
the original recipe. Actually, I've upped the amount of this
ingredient to the maximum to help use the stuff up! Following this
recipe should give around 23 litres of fermentable wort, with an
original gravity of 1.038, which should in turn give a beer with
final strength of 3.7%.
Part 2 getting it all weighed out
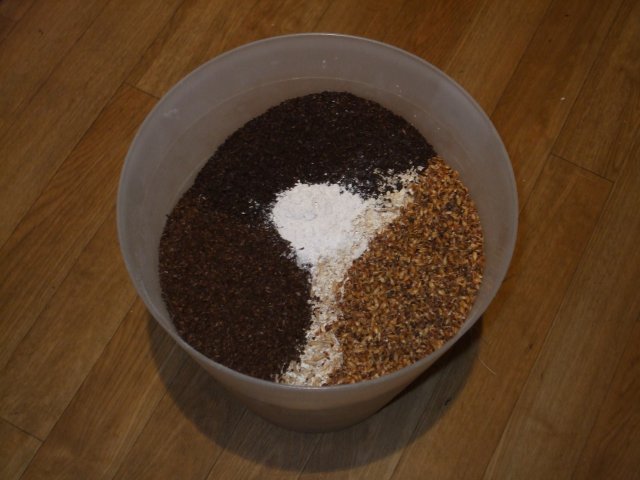
Here are all the dry ingredients in a bucket, weighed out the
night before. The malt is out of sight on the bottom. On the top
you can see roasted barley (top), crystal malt (bottom right) and
chocolate malt (bottom left). The white stuff in the middle is my
added salts. At one point, I went to great lengths to figure out
the salts that I needed to add to my local tap water in order to
get a good brewing water. It worked out something like this: 2 tsp
gypsum (calcium sulphate) , 1/3 tsp calcium chloride, 1/6 tsp
Epsom salts (magnesium chloride) and a pinch of sable salt for an
average sized mash. This is for the very soft water that we get
here. It will be different for everyone. I'm never sure whether
using the salts made much of a difference, but now I just chuck
them in for luck.
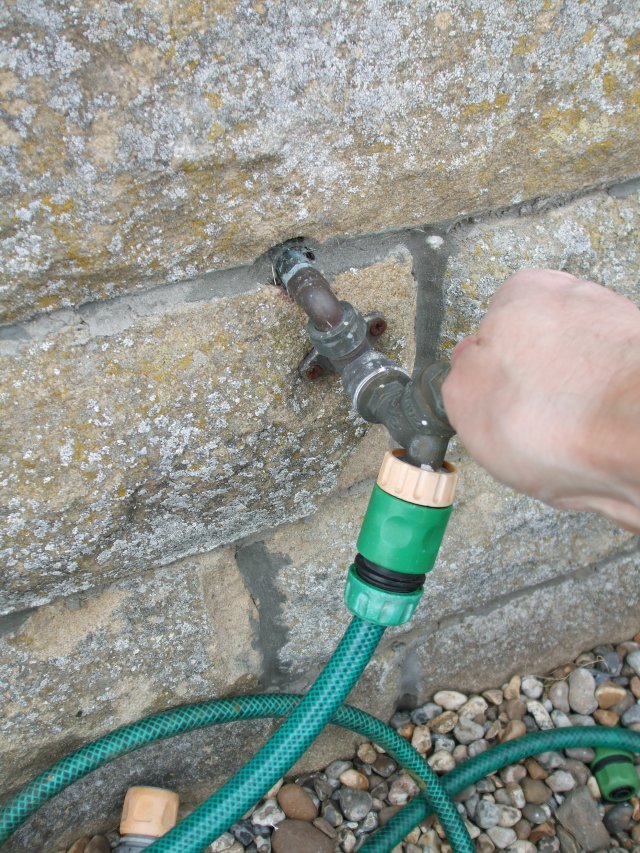
Part 3 - the water
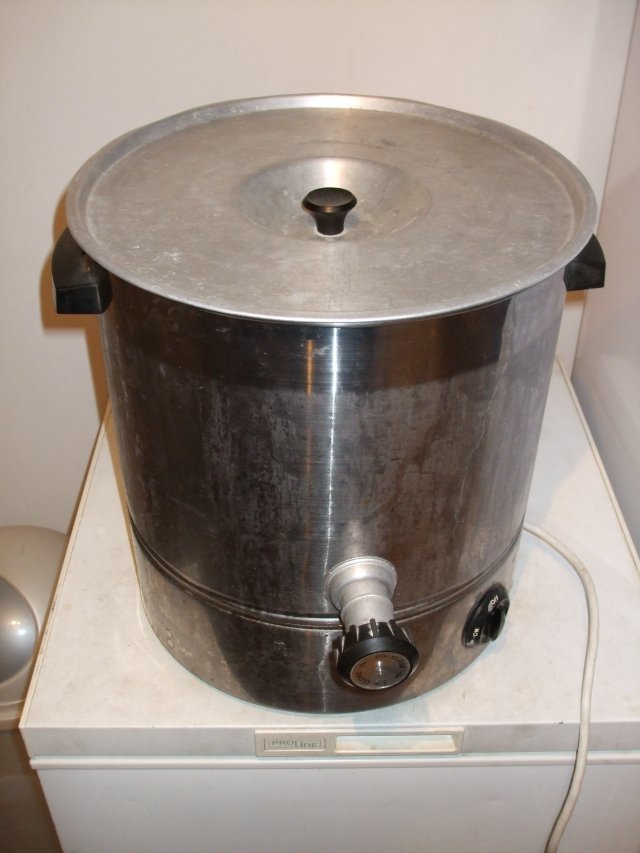
The night before, I fill up the "hot liquor tun", AKA tea urn,
with cold tap water. This isn't treated with salt additions, as I
add them to the grain mix. Then I get up about 7am, plug the thing
in, and go back to bed for 30 minutes or so....
Part 4, 5, 6... etc, you get the idea...
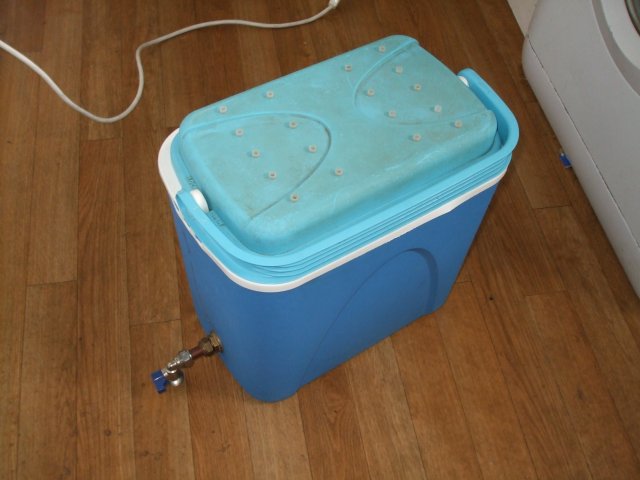
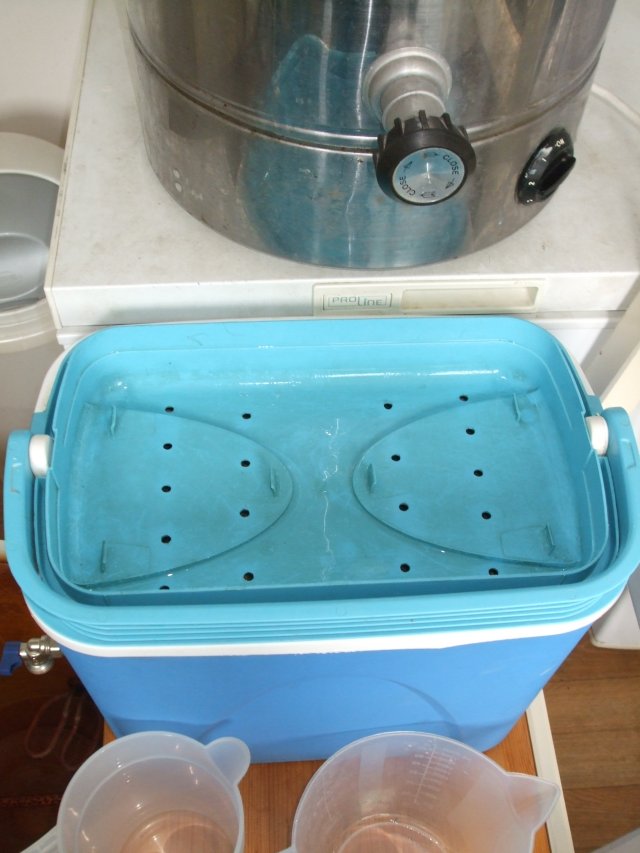
When I get up, I look out this old thing. It's the mash tun, which
started out in life as a cheapo cooler from ASDA. Inside, there
are a few bits of copper pipe with slits cut in them with a
hacksaw. They join together and then empty to the outside via the
blue tap you can see. There are numerous variations on this design
that can be found on the internet. One thing you might notice is
the little white things on the lid. What I've done here is drill
small holes in the lid, then stopper them with little plastic
stoppers. The reason will come clear later on.
I'm waiting for the temperature of the water to get over 75C. This
is so that when it goes into the mash tun, it will end up around
72C (if it ends up significantly off, it can be corrected by
adding a bit more hot or cold water, as appropriate). I usually
mash with 3 litres of water to each kg of grain. So here, with
4.3kg of grain, I'm looking for around 13 litres of water.
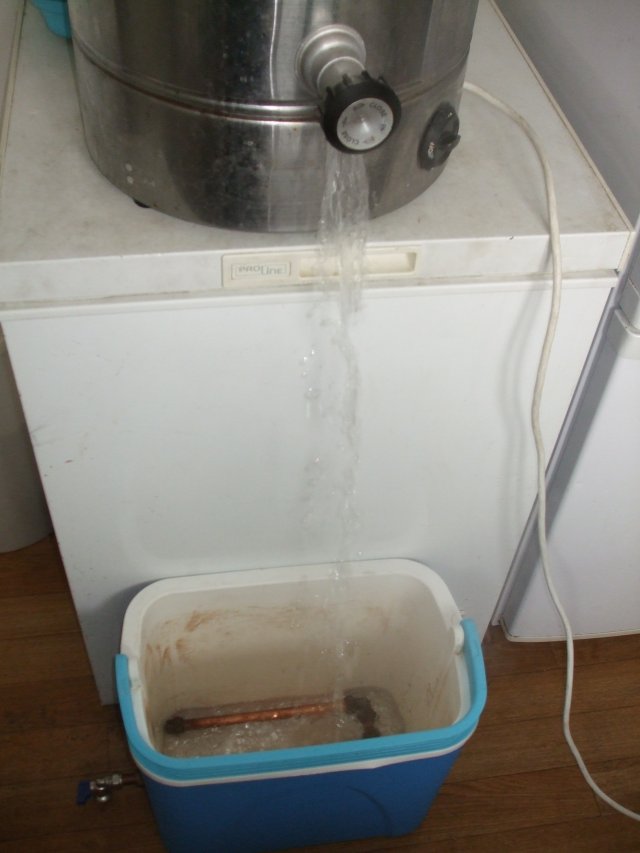
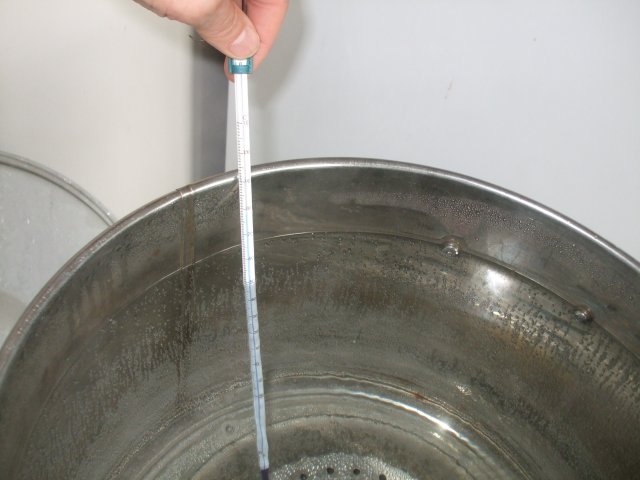
Hot water going into the mash tun.
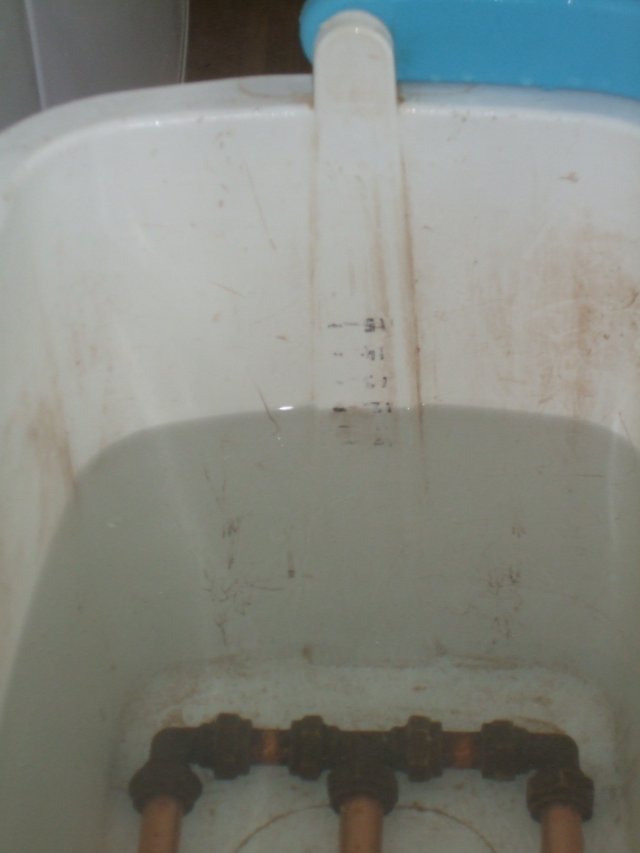
The inside is calibrated, but I managed to stop at 12 litres
instead of 13, oops. Never mind, these wee things rarely make a
lot of difference.
Now we're really cooking, the grains get tipped in gradually,
while stirring with a long-handled plastic spoon.
Measuring the temperature of the mash is important. Most people
aim for around 66-67C. Lower gives a higher alcohol beer with less
body. Higher gives the opposite. I seem to have hit on 67C despite
my little error with the amount of hot water to begin with. After
that, the top is put back on and the mash allowed to sit for 90
minutes. Meanwhile, the HLT is topped up again and turned back on,
aiming for anywhere between 75-85C. I don't bother treating this
water - apparently it's during the mash that is most important.
While we're at it, I used to drop in half a campden tablet into
each tea urn load of water prior to heating, which is supposed to
remove chlorine and chloramine from tap water. After forgetting a
few times and noticing no difference, I've stopped bothering. In
some areas with heavy water treatment, this would probably be
essential.
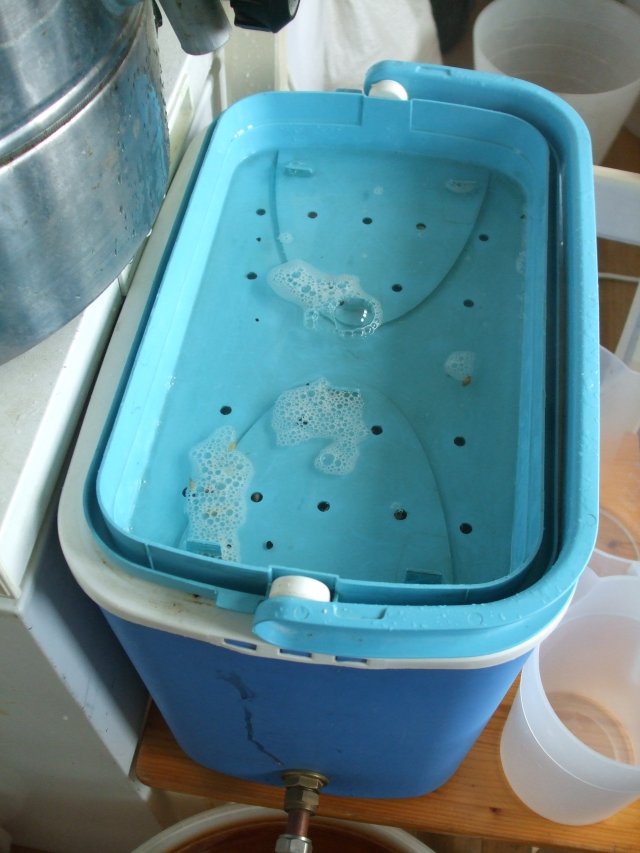
After the 90 mins is up, the mash tun lid is removed and the wee
stoppers taken out. Then it is flipped and put back on. You can
see here the arrangement in readiness for the next stage. Highest
up is the HLT, draining into the mash tun (the lid with holes in
helps to distribute the water evenly over the grain bed), with the
boiler just visible below that on the left (you can see the
element in this pic if you look closely).
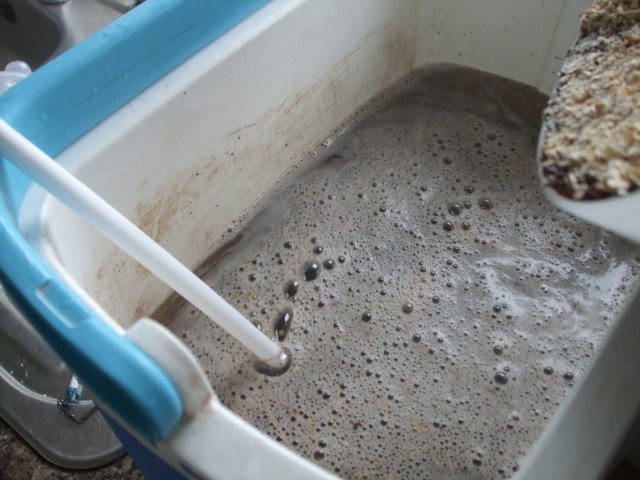
The hot water is poured into the tun until it fills up. And so
commences the sparging stage, where the malty goodness is washed
away from the grains using hot water.
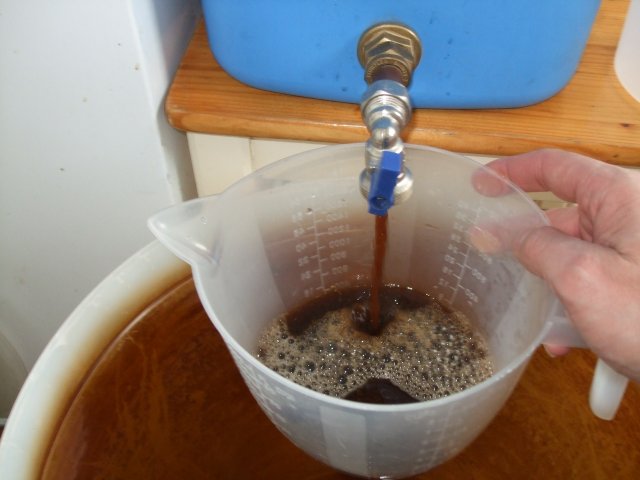
The tap of the mash tun is then opened and the first runnings
collected. This is done with a jug in each hand. A litre is
collected in each...
...then poured back into the top. This collects particulates and
recirculates them, helping to give a clearer beer. I usually
recirculate 6 - 8 litres.
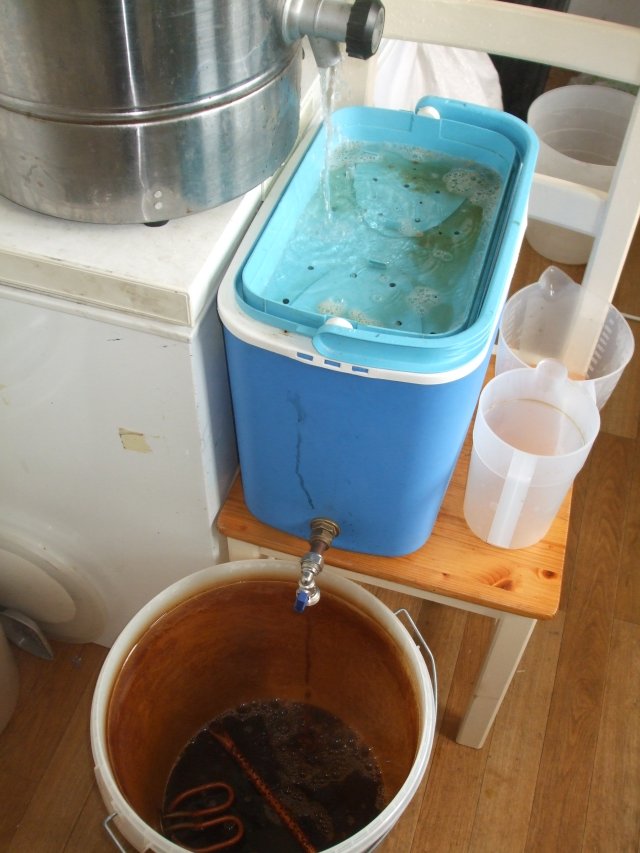
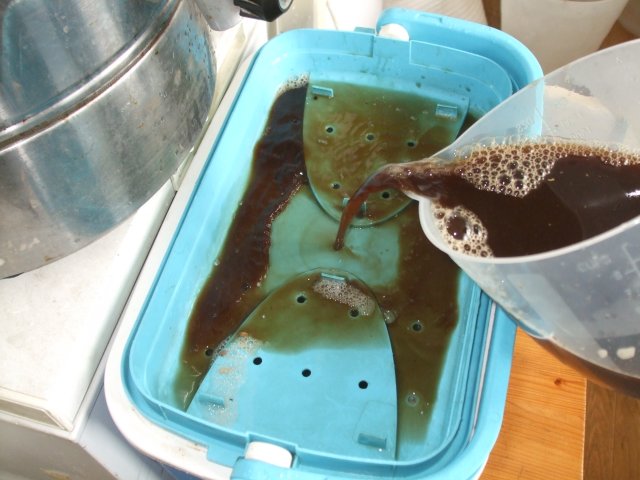
Once recirculation is over, the run off from the mash tun is
collected in the boiler and hot water from the HLT is dribbled in
at the same rate.
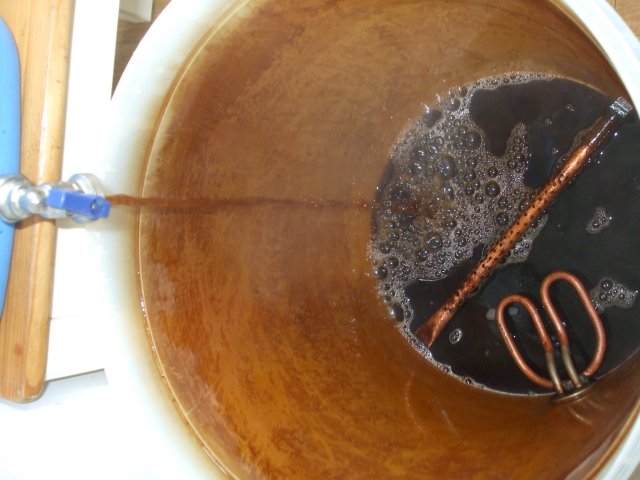
The boiler starts to fill up. Here you can see the element and hop
filter (copper pipe with small holes drilled into it). This is
basically just a plastic bucket with a kettle element and a tap. I
bought mine ready-made (though the hop filter was my own
addition). Again, you will find lots of how-tos on the internet
for making your own, or else you can buy one ready-made. I didn't
trust myself to make something that wouldn't spill 30 litres of
boiling wort at just the wrong moment.
Once filled, the boiler is plugged in and covered by a lid, with
the thermometer held in place using a clothes peg. Using a lid is
a potentially dangerous move. You need to check regularly and
remove it once the temp rises close to 100C. Failure to do this
results in a hot, sticky boil over scenario. It is worth the risk
in order to speed up the boil.
After about 30 minutes a rolling boil is achieved and the lid
comes off.
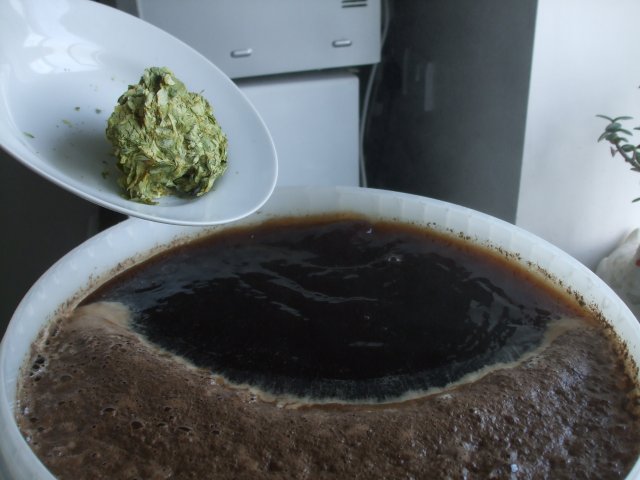
Next, the bittering hops are added (Target in this case) and
stirred in. The whole lot is left to boil away for a total of 90
minutes.
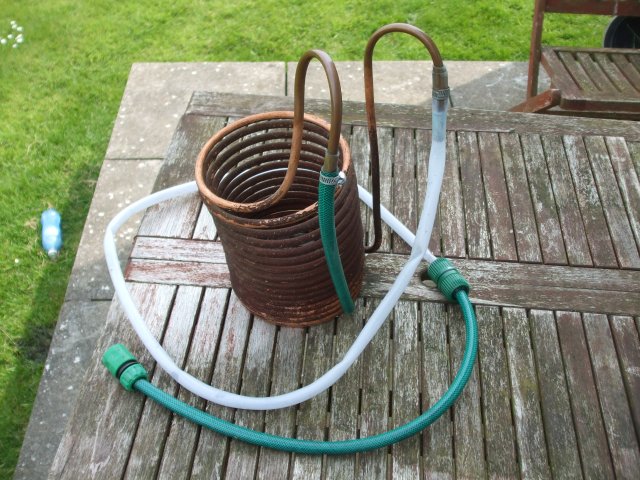
Next, I look out the cooling coil. Cold water goes in one end and
comes out hot the other.
With 15 minutes to go, the coil is placed in the boiler. This
allows it time to heat up and kill any bugs that might be lurking
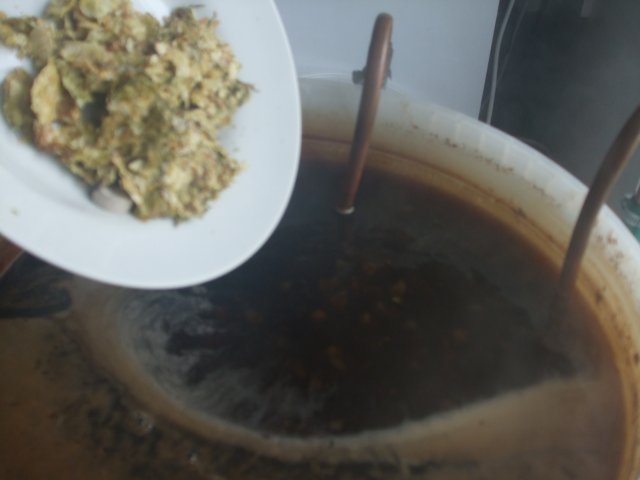
on the coil. Then there is an addition of Challenger hops for
flavour. You might also be able to make out a light brown tablet
of Protofloc on the plate. This is a seaweed derivative, which
helps to clump the proteins together, making for a clearer beer in
the end. I tend to use half a tablet per batch.
Hot and blurry, the final stir goes on. Once 90 minutes have
elapsed since the start of the boil, the boiler is turned off.
The cold water supply to the cooling coil is switched on.
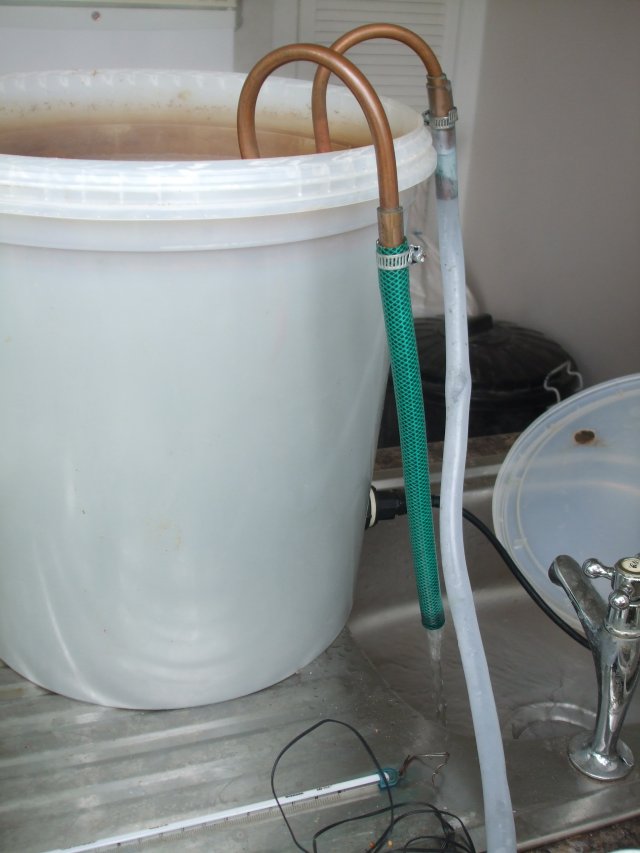
Cooling in progress, with the water exiting from the cooling coil
and going down the sink.
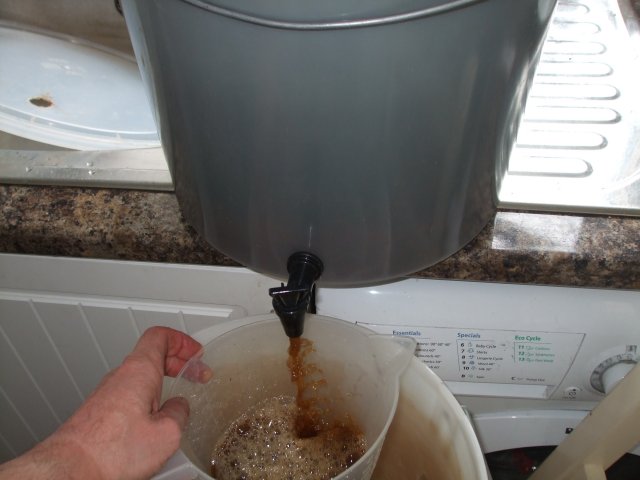
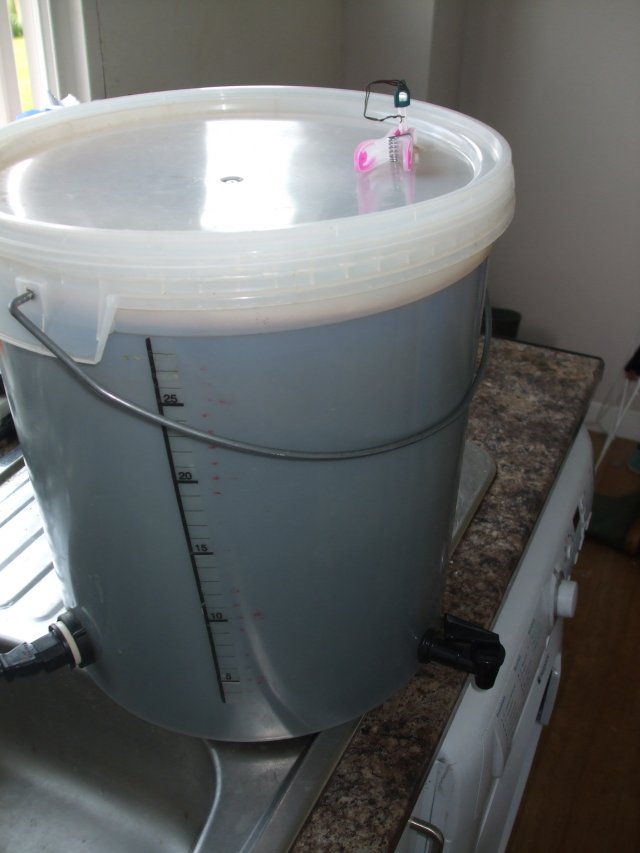
The cooled wort is released into a sanitised fermenting bucket,
and the first litre or so of run-off collected in a jug to be
recycled at the top.
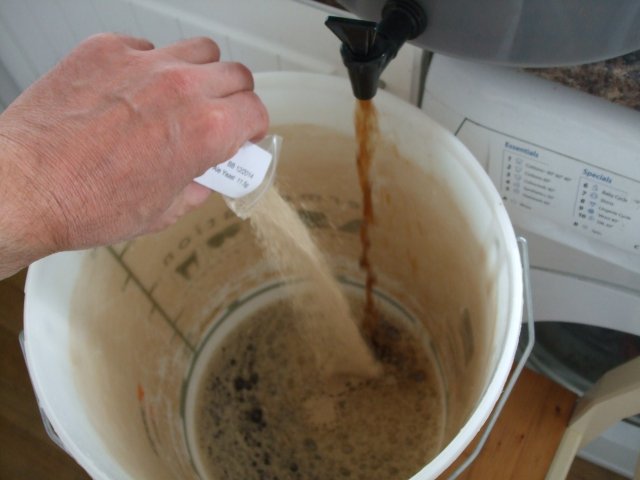
While the wort is draining into the fermenting vessel (FV), I pour
in the yeast. This is dried Nottingham ale yeast. I use it because
I like the results and it is easy to use.
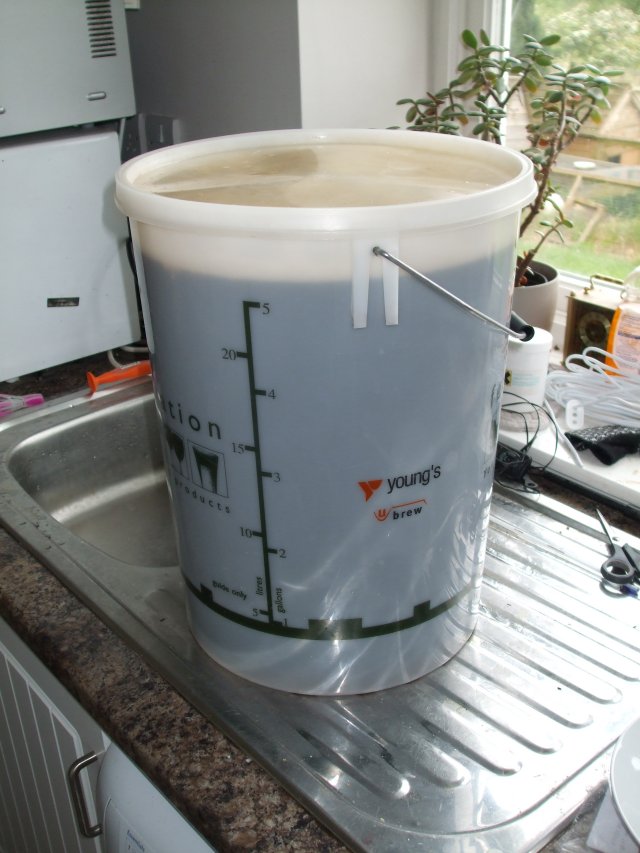
After a few minutes, the FV fills up, here to just over 23 litres.
The froth subsides in a few minutes.
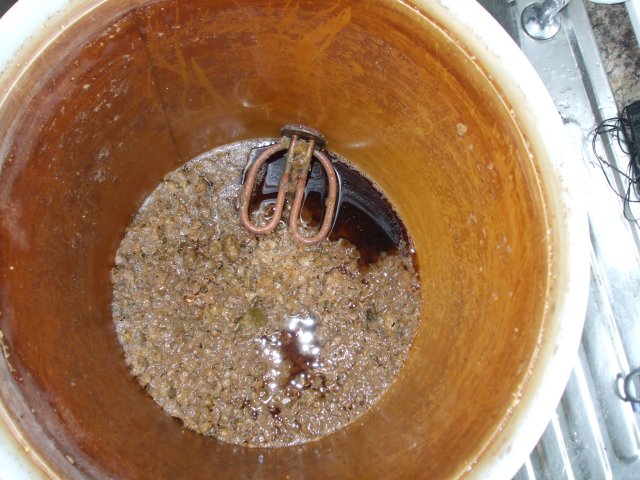
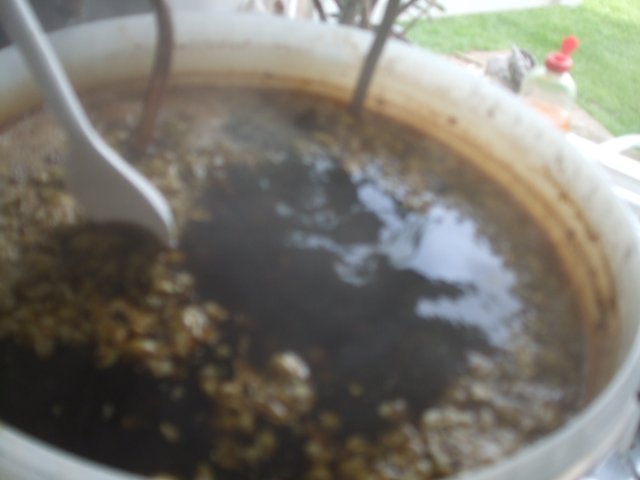
There is just some leftover hops and congealed proteins at the
bottom of the boiler.
A lid is then put on the FV and opened up a crack to let out the
CO2.
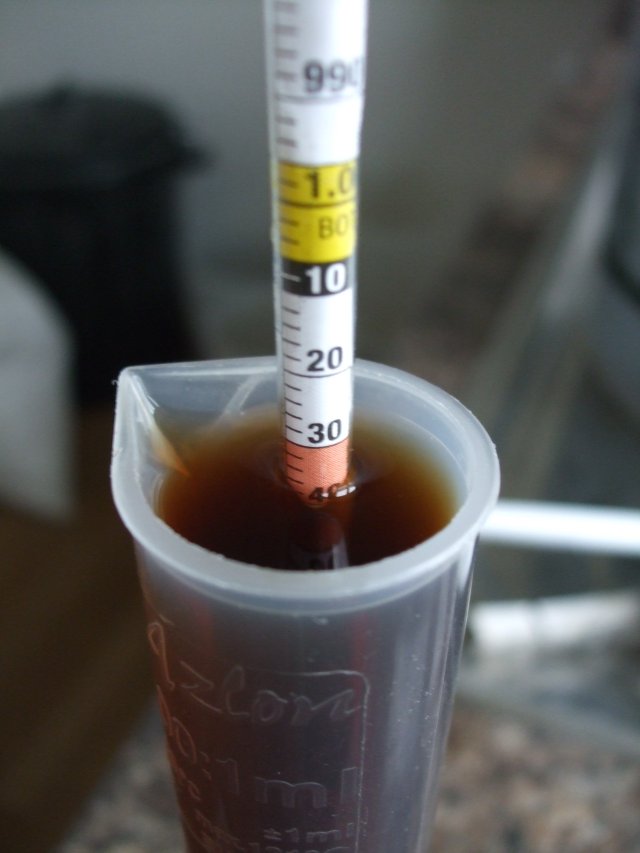
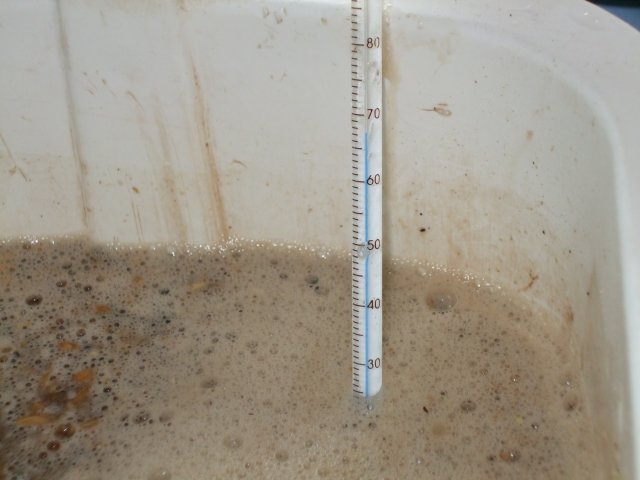
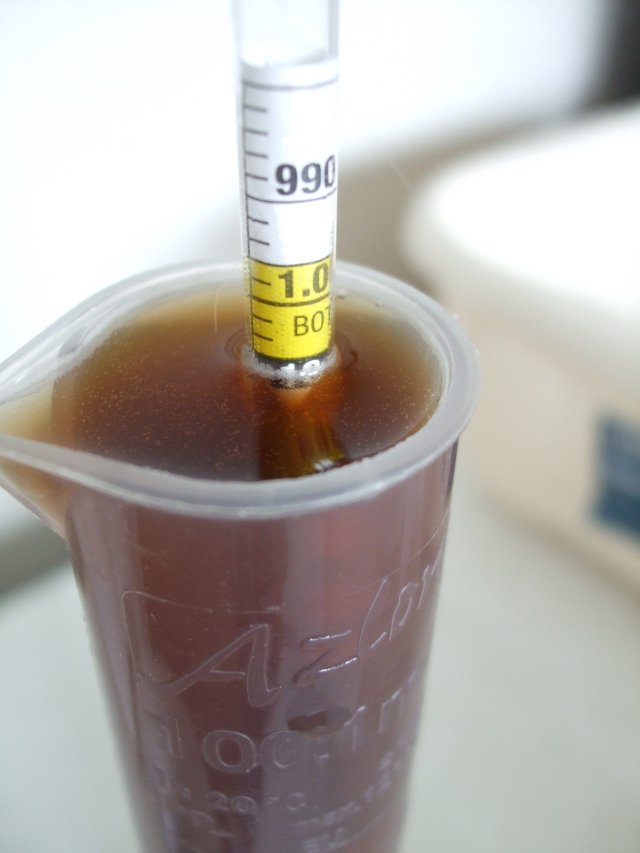
A small amount of wort is reserved for testing the original
gravity (OG). This comes out at 1.038, for once exactly what was
predicted!
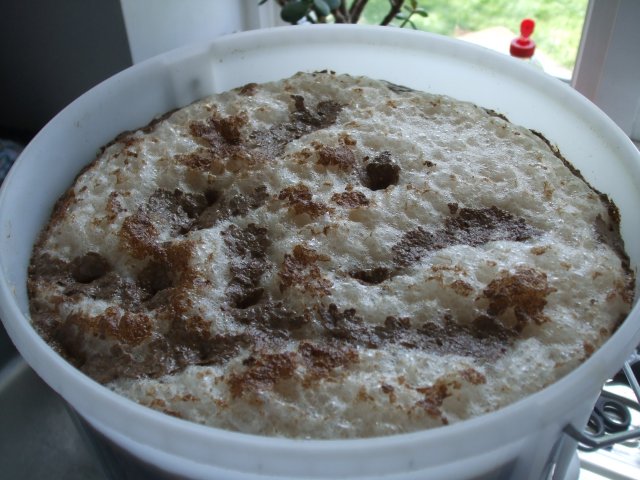
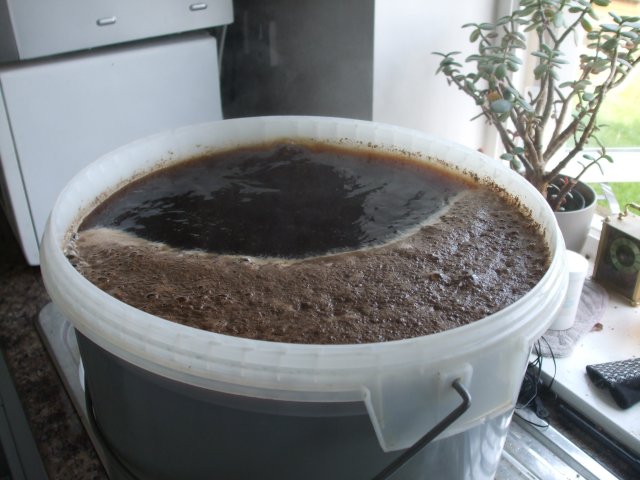
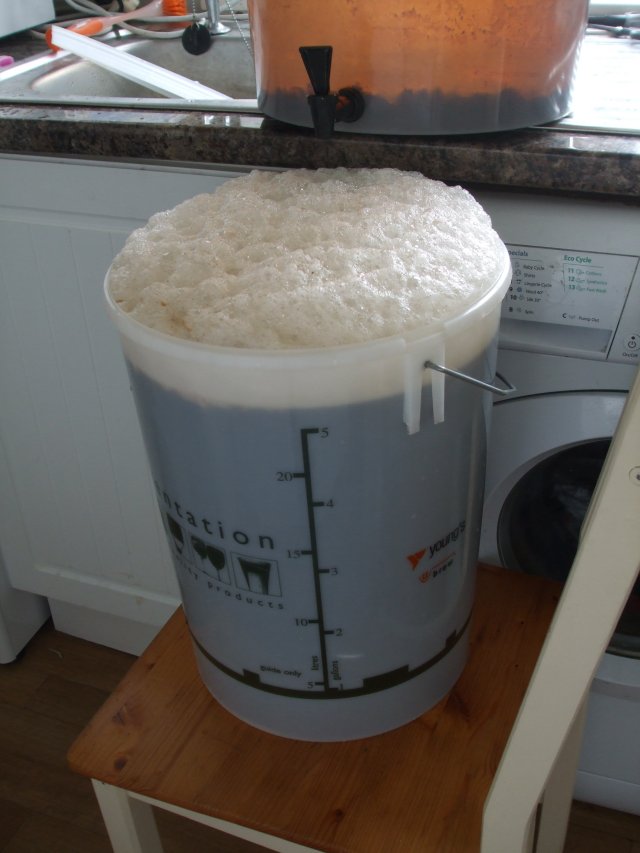
Fast forward 24 hours, quickly removing the top reveals a mass of
nicely fermenting beer...
After fermenting for a week, the beer reaches final gravity of
about 1.009, and is ready for kegging. The barrel is cleaned and
sanitised and primed with 40g of sugar.

Here is the beer being syphoned off into the barrel. The top is
screwed on once finished and the barrel left to mature for a few
weeks. Ideally about 4-6 weeks, but sometimes I'm getting stuck in
after only two. "Green" beer can taste great, but be aware that it
can increase the frequency of gaseous emissions from the nether
regions. You might notice that there is another batch of beer to
the left - it has just been boiled and cooled, ready to be drained
into the fermenting bucket on top of the leftover yeast from the
previous batch. This is a good way to cut down costs, but I tend
not to re-use yeast this way more than once to reduce the chances
of any contamination happening. Not sure how likely this is, but
that's just how I do it.
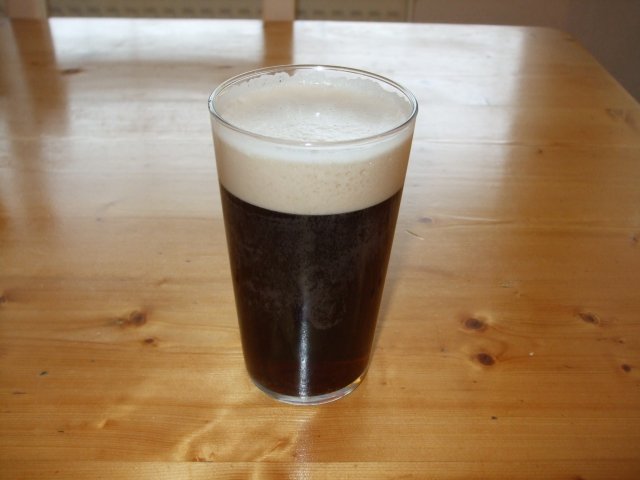
A few weeks later and here is the finished product, freshly poured
from the barrel at room temperature. Smooth, dark and full of
flavour, balanced with a tangy bitterness, it slipped down a
treat! It may take a few weeks to get to this stage, but none of
the steps are particularly difficult. So if you have time on your
hands and can afford about 20-odd pence per pint, then why not try
making your own real ale.
adp-stuff
(C) Alan Pemberton, last edited 07/06/14